

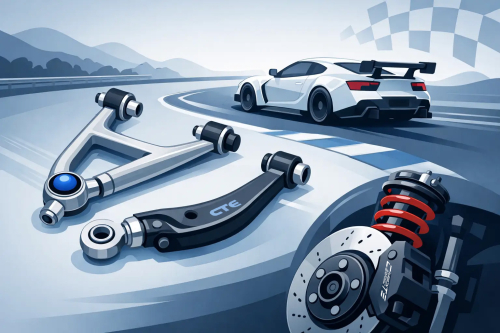
A car that moves under braking, misses an apex after a curb strike, or chews through its front tires is not asking for more power. It is asking for control. Performance control arms for track cars give the suspension a more stable, precise foundation when factory arms, soft bushings, and limited alignment range become the weak link.
For track-focused builds, control arms are not cosmetic hardware. They locate the wheel through braking, cornering, acceleration, and suspension travel. Their stiffness, geometry, joints, and adjustment range determine whether the alignment you set in the paddock remains where it belongs after repeated high-load laps.
Why Factory Control Arms Reach Their Limit
Original equipment control arms are designed around a broad brief: ride quality, noise isolation, production cost, long service life, and predictable behavior for the average street driver. That is the correct solution for a daily-driven vehicle. It is not always the correct solution once the car runs aggressive tires, track brake pads, stiffer springs, aerodynamic load, or repeated threshold braking.
The first limitation is usually compliance. Rubber bushings deliberately flex to filter road vibration and impact. Under track loads, that movement can change toe and camber at exactly the moment the tire needs a stable contact patch. The driver may feel this as delayed turn-in, vague steering at corner exit, instability under heavy braking, or a car that responds differently from one lap to the next.
The second limitation is adjustment. Lower ride height and increased cornering force often require alignment settings beyond factory adjustment range. If the vehicle cannot achieve the required camber, caster, or toe without compromise, tire temperatures and wear patterns will reveal the problem quickly. More negative camber may protect the outer shoulder in sustained cornering, but excessive camber or incorrect toe can reduce braking performance and destroy tires on the straights.
What Performance Control Arms for Track Cars Change
A properly engineered performance arm improves precision by reducing unwanted deflection while providing controlled, vehicle-specific adjustment. The goal is not to make every connection completely rigid. The goal is to place stiffness where it preserves geometry and use joint technology that survives the intended environment.
High-quality arms commonly use forged, billet, or precision-fabricated structures with stronger load paths than flexible stamped components. Material alone does not define quality. The arm must resist bending and fatigue without adding unnecessary mass, clear the wheel and chassis throughout travel, and maintain correct ball-joint and bushing angles at the target ride height.
Adjustment is equally critical. Camber adjustment helps keep the tire square to the track surface through cornering. Caster adjustment can improve steering weight, straight-line stability, and dynamic camber gain. Toe adjustment affects turn-in response, stability, and tire wear. These settings work together. A component that offers maximum adjustment but makes repeatable alignment difficult is not a racing-grade solution.
Track cars also benefit from control arms that make setup changes measurable and repeatable. Clearly indexed adjustment points, secure locking hardware, and accessible adjusters reduce workshop time between sessions. That matters when a team is chasing tire temperature consistency rather than guessing at geometry.
Bushings, Spherical Bearings, and the Real Trade-Off
The joint at each end of the arm often matters as much as the arm itself. Rubber remains a practical option for street-driven performance vehicles because it controls noise, vibration, and harshness while requiring limited maintenance. A firmer performance bushing can reduce deflection, but it must be correctly designed for articulation. An overly constrained bushing can bind as the suspension moves, creating inconsistent handling and premature wear.
Spherical bearings and motorsport-style joints provide the highest level of location accuracy and articulation. They are especially valuable where braking forces and lateral load demand stable wheel control. The trade-off is direct: more precision usually means more transmitted noise, more exposure to contamination, and greater inspection requirements. A spherical-bearing setup is not automatically the best choice for a luxury vehicle that spends most of its life on rough public roads.
For a dedicated track car, this trade-off is often justified. For a dual-purpose Porsche, BMW, Toyota Supra, Nissan GT-R, Tesla, Jaguar, Land Rover, or Defender build, the correct joint package depends on mileage, road conditions, power level, ride height, and the driver’s tolerance for added mechanical feedback.
Geometry Must Be Engineered as a System
Control arms cannot be specified in isolation. Lowering springs, coilovers, wheel offset, tire diameter, sway bars, hubs, tie-rod ends, and braking hardware all influence the final result. An arm that looks correct at static ride height can create clearance issues or poor joint angles at full bump, rebound, or steering lock.
Bump steer deserves particular attention. When the suspension travels, the steering linkage and control arm must move through compatible arcs. If their relationship is altered without correction, toe changes during compression or rebound. The result can be a nervous car over curbs, braking instability, or a steering wheel that needs constant correction at speed.
Roll-center position and camber curve also deserve more respect than they usually receive in aftermarket conversations. Lowering a car can improve its center of gravity, but excessive lowering may put arms at unfavorable angles and reduce the suspension’s ability to control the tire. A vehicle that sits aggressively low in the paddock may be slower, less predictable, and harder on components than one set at a more disciplined ride height.
This is why vehicle-specific development matters. A universal part can offer adjustment, yet still fail to deliver the intended geometry, load capacity, clearance, and service life. Track hardware should be validated against the actual chassis, not merely adapted to fit mounting holes.
Match the Arms to Braking and Tire Load
A control arm upgrade becomes more valuable as braking capability rises. Carbon ceramic brake systems, high-friction pads, wider tires, and improved cooling allow the driver to brake later and harder, but they also place greater longitudinal load into the chassis and suspension. If the front wheels shift under braking because bushings compress or arms deflect, the brake system cannot deliver a stable, confidence-building pedal-to-road result.
This connection is especially relevant on heavy, high-performance vehicles. A powerful luxury sedan, electric performance vehicle, or SUV can generate extreme tire and brake loads even before adding track-oriented modifications. Stronger stopping performance must be supported by chassis components that hold alignment under the same force.
CCYS approaches this category from that full-system perspective, pairing performance braking expertise with supporting chassis components engineered for demanding use. With 90% of production controlled in-house and quality systems aligned with IATF 16949 and ISO 9001 standards, the focus is consistent fitment, material control, and repeatable execution rather than disconnected parts selection.
How to Specify the Right Control Arm Package
Start with the vehicle’s use case, not the most aggressive catalog option. A time-attack car on slicks needs different priorities than a street-driven coupe attending several track days each year. Be specific about tire type, ride height, wheel fitment, power output, brake package, track frequency, and whether the car sees winter weather or rough roads.
Then identify the alignment target before purchasing parts. If the only issue is insufficient front camber, a dedicated upper arm or camber plate may be the correct solution. If braking stability, rear traction, and tire wear are all compromised, a broader package of arms, links, ball joints, and tie-rod components may be justified. Replacing parts without a defined geometry goal can make the chassis harsher without making it faster.
Installation quality is non-negotiable. Torque fasteners at the correct suspension position where required, use the specified locking method, and verify clearance through full travel and steering range. Follow with a professional alignment and, ideally, a corner-balance session for coilover-equipped cars. After the first track event, inspect hardware, witness marks, boots, bearings, and tire wear before assuming the setup is finished.
Precision Is the Safety Margin
The best control arm is not the one with the most visible adjustment or the hardest bushing. It is the one that holds the intended wheel geometry through repeated braking zones, loaded corners, heat cycles, curbs, and hard use without creating new problems elsewhere in the suspension.
Choose components as part of a complete chassis and braking plan, then validate the result with alignment data, tire temperatures, driver feedback, and regular inspection. When the car stays composed at the end of a session, the driver can focus on braking later, turning cleaner, and using every lap to improve.